10 Online Tutorials for Dance Makeup Special Effects
Share
You're about to discover the secrets of dance makeup special effects! With online tutorials, you can master prosthetic applications, creating creepy character creations that'll leave the crowd in awe. Learn glowing skin effects, blood and wound techniques, and zombie apocalypse looks that'll transform your dancers into unforgettable creatures. Immerse yourself in enhanced eye makeup designs, fantasy creature transformations, and UV reactive makeup designs that shine under black lights. Want to create dramatic day-to-night transformations? You got this! Take the first step into the world of dance makeup special effects, and get ready to uncover more thrilling techniques.
Key Takeaways
• Mastering prosthetic applications and techniques is essential for creating dramatic dance makeup special effects.
• Understanding color theory and skin undertones is crucial for achieving realistic blood and wound effects.
• Airbrushing techniques and tools can help create seamless, high-impact designs for dance performances.
• Glowing skin effects and enhanced eye makeup designs can elevate the overall aesthetic of dance makeup special effects.
• Online tutorials can provide step-by-step guidance on achieving fantasy creature transformations and otherworldly characters.
Mastering Prosthetic Applications
Applying prosthetics demands meticulous planning and precision, as a single misstep can compromise the entire makeup design. You're about to start on a journey that requires patience, skill, and attention to detail.
As you explore the world of prosthetic applications, you'll discover a rich history that dates back to ancient civilizations. From silicone to foam latex, prosthetic materials have evolved greatly over the years, offering you a wide range of options to achieve the desired look.
When it comes to mastering prosthetic applications, understanding the different materials is essential. You'll need to take into account factors like durability, flexibility, and adhesion. For instance, silicone prosthetics are ideal for creating realistic skin textures, while foam latex is better suited for larger, more dramatic pieces.
Creepy Character Creations
With a solid grasp of prosthetic applications, you're now prepared to ignite your darkest creativity on the dance floor, conjuring up eerie characters that will leave the audience shivering in their seats.
As you explore the world of creepy character creations, remember that character development is key. Your design should tell a story, evoking emotions and sparking imagination. Draw inspiration from mythology, folklore, or even your own nightmares to craft a narrative that will haunt the audience.
Consider the physical characteristics, backstory, and motivations of your character. What drives them? What're their fears and desires? How do these traits manifest physically? Perhaps your character has glowing eyes, razor-sharp claws, or skin that shifts like the shadows. The more detailed your character development, the more believable and terrifying they'll be.
Storytelling inspiration can come from anywhere, so keep your eyes and mind open to the world around you. As you bring your character to life, remember to balance creativity with technical skill, ensuring a seamless blend of artistry and realism.
Glowing Skin Effects
As you bring your eerie character to life, you can amplify their unsettling aura by incorporating glowing skin effects that eerily luminesce in the dark. To achieve this, focus on creating luminous complexions that seem to radiate an otherworldly energy.
Start by applying a thin layer of glow-in-the-dark paint or makeup to the skin, allowing it to set before adding additional layers. This will guarantee a subtle, ethereal glow that's not too overpowering.
To add depth and dimension, use radiant highlights to accentuate key features like cheekbones, brows, and lips. You can use a combination of glow-in-the-dark pigments and shimmering powders to create an iridescent sheen. Be strategic with your highlighting, as this will help direct the viewer's attention to specific areas of the face.
When applying glow-in-the-dark makeup, remember to work in thin, even layers, building up gradually to achieve the desired level of luminescence.
Blood and Wound Techniques
As you explore the world of blood and wound techniques, you'll learn how to master the art of creating realistic wounds that will leave your audience in awe.
You'll discover the secrets of wound color theory, from the subtle nuances of flesh tones to the deep crimson of fresh blood.
Wound Color Theory
Mastering the color theory behind blood and wound techniques is crucial for achieving realistic wound effects. This involves understanding how to mix and apply colors to create convincing, gruesome injuries. This is where color harmony comes into play, as balancing warm and cool tones is vital to create a natural, yet disturbing, look.
To get started, consider the following key factors:
-
Skin Undertones: Identify the model's skin undertones (pink, yellow, or neutral) to determine the right shade of 'blood' to use.
-
Color Contrast: Balance warm and cool tones to create depth and dimension in your wound design.
-
Saturation and Value: Control the level of brightness and darkness to achieve a realistic, 3D effect.
- Texture and Sheen: Add texture and sheen to your design to give it a lifelike appearance.
Realistic Blood Flow
To create a believable blood flow effect, you'll need to understand how to manipulate the viscosity, texture, and color of your blood product to mimic the way real blood behaves in different wound scenarios. You'll want to master the art of blood consistency, achieving the perfect balance between fluidity and thickness.
Vein mapping is essential, as it allows you to create a realistic network of blood vessels beneath the skin.
Capillary action is another key factor, as it enables you to control the spread of blood and create a natural-looking flow. By understanding fluid dynamics, you can recreate the way blood pools, drips, and flows in response to gravity and pressure.
For instance, you might use a thicker blood product for a deep gash, while a thinner consistency would be more suitable for a shallow cut. By fine-tuning these elements, you'll be able to craft a blood flow effect that's both realistic and terrifying.
With practice and patience, you'll be able to create a blood flow that's so convincing, it'll leave your audience gasping in horror.
Gelatin Wound Molds
Creating a realistic wound requires more than just blood flow, and that's where gelatin wound molds come in, allowing you to craft three-dimensional wounds that add depth and texture to your makeup design. With gelatin wound molds, you can create realistic cuts, gashes, and lacerations that will make your audience gasp in horror.
Here are some key things to keep in mind when working with gelatin wound molds:
-
Gelatin Uses: Gelatin is a versatile material that can be used to create a variety of wound types, from shallow cuts to deep gashes. Experiment with different mold shapes and sizes to achieve the desired effect.
-
Mold Maintenance: To make sure your gelatin wound molds last, make sure to clean and store them properly after each use. This will prevent mold growth and keep your molds in good condition.
-
Tips for Application: When applying your gelatin wound mold, use a thin layer of adhesive to secure it to the skin. Use a setting spray to set the mold in place and prevent it from shifting during performance.
- Practice Makes Perfect: Don't be discouraged if your first attempts at using gelatin wound molds don't turn out as expected. Practice makes perfect, so keep experimenting and refining your technique.
Zombie Apocalypse Looks
With a few clever makeup tricks, you can transform into a post-apocalyptic undead creature that's sure to send chills down the spines of the living. To create a convincing zombie look, you'll need some essential makeup tools and techniques. Start by applying a pale foundation to give your skin a deathly pallor. Use dark eyeshadows to create sunken eyes, and add some fake blood for a gruesome touch.
To take your zombie look to the next level, incorporate some Apocalypse accessories into your costume. Try adding torn and tattered clothing, fake wounds, and prosthetic limbs to create a truly terrifying appearance.
Here are some essential items to include in your zombie costume:
| Apocalypse Accessories | Zombie Costumes | Makeup Essentials |
|---|---|---|
| Torn clothing | Ripped jeans | Pale foundation |
| Fake wounds | Tattered shirts | Dark eyeshadows |
| Prosthetic limbs | Bloody apron | Fake blood |
Airbrushing for Dance
As you venture into airbrushing for dance, you'll need to familiarize yourself with the basic airbrush tools, including the compressor, hose, and gun.
Mastering spray techniques is essential, and that's where practice comes in – you'll need to hone your skills to achieve a seamless blend.
With the right tools and techniques, you'll be able to create stunning, high-definition designs that elevate your dance makeup looks.
Basic Airbrush Tools
You'll need a few essential airbrush tools to get started with dance makeup special effects. These tools will help you achieve professional-looking results and make sure that your makeup stays in place throughout the performance.
Here are some must-haves to add to your kit:
- A high-quality airbrush with a fine tip for precise detail work
- A reliable compressor that can handle continuous use
- An air hose that's long enough to give you freedom of movement
- A cleaning kit for regular airbrush maintenance and brush cleaning
Spray Techniques Mastery
Mastering airbrush spray techniques is essential for achieving precise, high-definition designs that pop under stage lights. It's important to practice various spraying methods to develop muscle memory and consistency. You'll want to focus on developing a smooth, even motion, experimenting with different spraying distances, and angles to achieve the desired effect.
Proper spray gun maintenance is critical to guarantee top performance. Regularly clean and lubricate your gun to prevent clogs and maintain a seamless spray pattern.
To take your skills to the next level, set up a dedicated spray booth to minimize overspray and contain the mess. This controlled environment will allow you to focus on perfecting your techniques without worrying about making a mess.
With a well-maintained spray gun and a dedicated spray booth, you'll be able to experiment with different spray patterns, from fine details to broad, sweeping strokes. As you practice, you'll develop the precision and control needed to bring your dance makeup designs to life.
Achieving Seamless Blend
With your spray gun skills refined, you're ready to focus on blending colors seamlessly, a critical aspect of airbrushing for dance that requires a deep understanding of how to merge hues without visible shifts.
As you work to achieve a flawless finish, remember that blending is all about creating a harmonious shift between colors. This is particularly vital when it comes to matching skin tones, as even the slightest mismatch can detract from the overall look.
To master seamless blending, keep the following tips in mind:
-
Start with a foundation match: Make sure your airbrush foundation matches your dancer's skin tone to create a natural-looking base.
-
Gradate your colors: Use a gradual shift between colors to prevent harsh lines and visible shifts.
-
Thin your paints: Use thinned paints to achieve a softer, more subtle merge.
- Practice, practice, practice: Seamless blending takes time and practice to master, so don't be discouraged if it takes a few attempts to get it right.
Enhanced Eye Makeup Designs
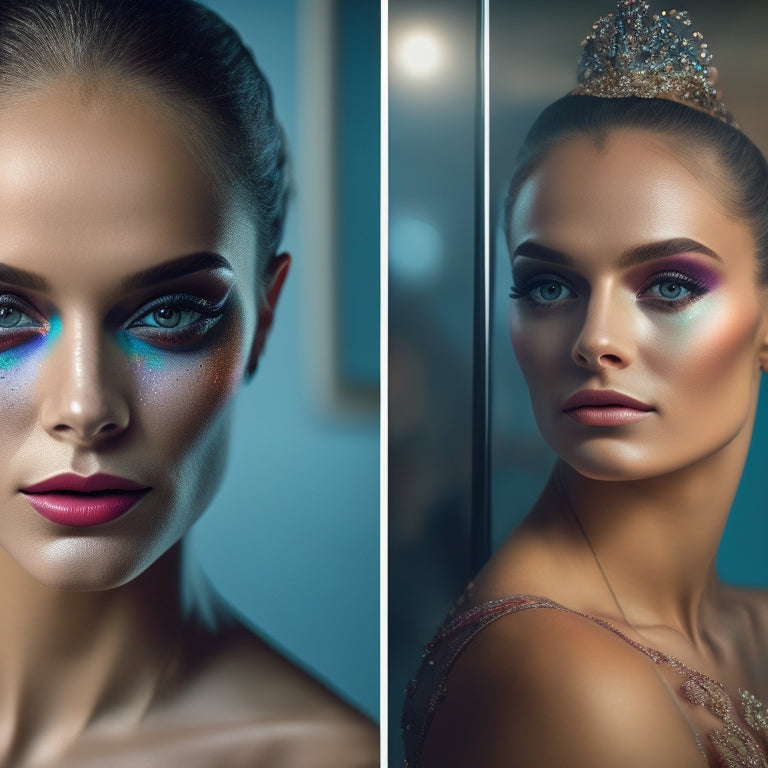
To elevate your dance makeup special effects, incorporate intricate details and bold colors into your eye makeup designs, using techniques like layering, blending, and stamping to create mesmerizing, high-impact looks. You'll be amazed at how these techniques can transform your eyes into a work of art.
For a Smoky Dramatics look, layer shades of gray, brown, and black to create depth and dimension. Use a light hand when applying these shades, building up gradually to achieve the desired intensity. Don't be afraid to experiment with different textures, like glitter or shimmer, to add an extra layer of drama.
Colorful Liners are another great way to add visual interest to your eye makeup design. Try using bright, bold colors like electric blue or hot pink to create a striking contrast with your natural eye color. You can also experiment with different liner styles, like cat eyes or winged liners, to add an edgy touch to your look.
With these techniques, you'll be able to create eye-catching designs that are sure to turn heads on stage.
Fantasy Creature Transformations
You'll explore your inner beast by summoning fantasy creatures with transformative makeup techniques that transport your dance performances to mythical domains. As you immerse yourself in the world of fantasy creature transformations, you'll discover the art of merging human and mythical features to create enchanting, otherworldly characters.
With online tutorials guiding you through the process, you'll master the techniques to:
-
Design and apply Mythical Hybrids, blending animal and human features to create mesmerizing creatures
-
Craft Whimsy Wings, delicate and ethereal, or bold and dramatic, to elevate your performances
-
Paint on reptilian scales, shimmering in shades of emerald and sapphire, to evoke ancient mythical beings
- Sculpt and shade to create textured, three-dimensional features, such as horns, fins, or claws, that transport your audience to fantastical realms
UV Reactive Makeup Designs
As you immerse yourself in the world of UV reactive makeup designs, your dance performances will electrify under black lights, as neon hues and radiant patterns come alive on your skin. With every step, your Blacklight Beauty shines, mesmerizing the audience.
To achieve this, you'll need to master the art of creating neon accents that pop under UV lights. Start by selecting specialized makeup products designed to react to black lights. These products contain fluorescent pigments that absorb UV energy and emit vibrant colors.
When applying UV reactive makeup, remember to use thin layers, allowing each layer to dry before adding more. This guarantees a seamless, even finish. To add dimension, use stencils or freehand designs to create intricate patterns. Neon accents can be applied using a small brush or a dotting tool for added precision.
Don't be afraid to experiment with different colors and techniques to create a unique Blacklight Beauty that's all your own. With practice, you'll be dazzling the crowd in no time!
Day to Night Makeup Transitions
By mastering UV reactive makeup designs, you've already showcased your ability to adapt to unique lighting conditions, and now it's time to take on the challenge of creating day to night makeup transformations that effortlessly shift from natural to dramatic, amplifying your performance's emotional impact.
To achieve a seamless shift, focus on creating a natural evolution of your look. Start with a subtle, natural base that can be easily built upon. As the performance progresses, use quick fixes like layering darker shades or adding dramatic highlights to transform your look. Consider creating a time lapse of your makeup process to identify areas for improvement and refine your technique.
Some essential makeup hacks to keep in mind:
- Use a light hand when applying products to avoid heavy, cakey buildup
- Invest in a versatile product palette that can be mixed and matched for different looks
- Practice your daily routine to streamline your process and minimize mistakes under pressure
- Don't be afraid to experiment and try new things – it's all part of the creative process!
Frequently Asked Questions
Can I Use Household Items to Create Special Effects Makeup?
"You can get creative with DIY alternatives, repurposing everyday materials like coffee grounds for a worn, earthy look or corn syrup for a glossy, wet effect - all without breaking the bank or sacrificing quality!"
How Do I Store and Organize My Makeup and Prosthetics?
"Just like a master chef safeguards their prized kitchen tools, you'll want to carefully curate your makeup station, ensuring each prosthetic is stored with TLC, and organized for easy access, so your creative genius can shine."
Are Online Tutorials Suitable for Beginners With No Experience?
As you venture into the world of dance makeup special effects, you'll find online tutorials can be a great resource, but be prepared to practice patience, as there's a learning curve - don't be too hard on yourself, it's a process!
What Safety Precautions Should I Take When Using Prosthetics and Adhesives?
As you set out on a fantastical journey, remember to safeguard your skin, just as a gentle dragon protects its treasure. Be cautious of skin sensitivity and potential allergic reactions when using prosthetics and adhesives, and always patch test before application.
Can I Use These Techniques for Film and Theater Productions as Well?
As you prepare for film and theater productions, you'll find these techniques highly adaptable; conduct thorough script analysis to inform character development, ensuring your makeup designs perfectly capture the character's essence and narrative arc.
Related Posts
-

Most Comfortable Ballet Tutus for Dancers
When searching for the most comfortable ballet tutus, prioritize breathable fabrics like chiffon and cotton blends. T...
-

The King Manual: Your Ultimate Knowledge Companion
The King Manual: Your Ultimate Knowledge Companion is an all-encompassing resource that opens up the power of knowled...
-

Innovative Therapy: Dance Movement's Healing Power
Dance movement therapy is a creative and evidence-based approach that harnesses the transformative power of movement ...


