7 Essential Dance Makeup Tips for Flawless Photos
Share
As you prepare for your dance photoshoot, mastering natural-looking skin tones is essential. Identify your skin undertones and choose a foundation that matches your natural tone. Enhance your facial features by defining your face shape and bone structure, and accentuate your eyes with waterproof eyeliner and lash extensions. Contouring and highlighting will add depth and radiance to your complexion. Building up your eye makeup with light, shimmery eyeshadows and adding drama with liner techniques will create a striking look. Now, take your dance makeup to the next level by uncovering the remaining essentials that will make your photos truly unforgettable.
Key Takeaways
• Master a natural-looking skin tone by understanding skin undertones and choosing a matching foundation for a flawless base.
• Define facial features by identifying face shape, understanding facial anatomy, and using highlighting and shadowing techniques accordingly.
• Contouring and highlighting techniques can accentuate facial features, create depth, and enhance a radiant complexion.
• Dramatic eye makeup techniques, including building depth with eyeshadow and applying liner, can add drama to dance photos.
• Finishing touches, such as emphasizing high points with highlights and blending seamlessly, can ensure a flawless finish in photos.
Mastering Natural-Looking Skin Tones
When applying dance makeup, achieving a natural-looking skin tone is vital, as it sets the foundation for a flawless, performance-ready look. As a dancer, you want your skin to appear smooth, even, and radiant under the bright lights of the stage or camera.
To achieve this, it's essential to understand your skin undertones. Are you cool, warm, or neutral? Cool skin undertones have a pink or blue undertone, warm skin undertones have a yellow or golden undertone, and neutral skin undertones have a balanced tone.
Complexion mapping is key to determining your skin undertones. By analyzing your wrist veins, you can determine your undertones. If they appear blue or purple, you have cool undertones; if they appear green, you have neutral undertones; and if they appear yellow or golden, you have warm undertones.
Once you've determined your skin undertones, you can choose a foundation that complements your natural tone, creating a seamless, natural-looking base for your dance makeup look.
Enhancing Facial Features for Camera
When you're preparing for a camera performance, it's crucial to enhance your facial features to guarantee you look great on screen.
You'll want to define your facial structure by creating the illusion of more defined bone structure and a slimmer face.
Define Facial Structure
To accentuate your facial features under the glare of stage lights, you must first identify the shape of your face, as this will inform the placement and emphasis of your dance makeup. Understanding your facial anatomy is vital in defining your facial structure. Start by examining your bone structure, noting the contours of your forehead, cheekbones, nose, and jawline.
Identify the overall shape of your face, whether it's oval, round, square, or heart-shaped. This will help you determine where to apply highlights and shadows to create a flawless, camera-ready look.
When analyzing your facial anatomy, pay attention to the proportions of your features. Are your eyes large or small? Are your cheekbones high or low? Are your eyebrows full or sparse? Knowing these details will enable you to enhance your best features and balance out any asymmetries.
Accentuate Cheekbones
Defining your cheekbone structure is crucial for creating a stunning, camera-ready look. Strategically applied highlights and shadows can elevate your facial features and create a chiseled, angular appearance.
To accentuate your cheekbones, start by applying a soft, Rosy Glow highlighter to the high points of your face: the tops of your cheekbones, nose, and cupid's bow. This will help create a natural-looking radiance that catches the light.
Next, use a contour shade one to two shades deeper than your natural skin tone to create Cheeky Contours. Apply this shade to the hollows of your cheeks, starting from the ear and working your way down towards the mouth. Remember to blend, blend, blend! A seamless shift between highlight and contour is key to a believable, camera-friendly look.
Enhance Eyes
Your eyes are the windows to your soul, and for a camera-ready look, you'll want to make them sparkle by creating the illusion of larger, more defined eyes. To achieve this, follow these essential tips:
-
Confirm your lash line:
Use a waterproof eyeliner to create a subtle, soft line that enhances your natural lash line. This will help create the illusion of thicker, fuller lashes. -
Add volume with lash extensions:
Consider getting lash extensions to add volume and drama to your eyes. This will make your eyes appear larger and more defined. -
Ensure eye symmetry:
Make sure that your eye makeup is balanced and symmetrical. Use a mirror to check that your eyeliner, eyeshadow, and lashes are even on both eyes.
-
Highlight your brow bone:
Apply a light shade of eyeshadow or highlighter to your brow bone to make your eyes appear more open and awake.
Contouring for Definition and Depth
When contouring for definition and depth, you'll want to analyze your face shape to determine the most flattering areas to accentuate. By identifying your face shape - whether it's oval, round, square, or heart-shaped - you'll be able to pinpoint where to apply contour to create the illusion of defined cheekbones, a slimmer nose, or a more angular jawline.
Face Shape Analysis
You'll need to identify your face shape to accurately contour for definition and depth, as a mismatch between your facial structure and contouring technique can exacerbate flaws rather than hide them. Understanding your face shape is essential in creating a harmonious balance between your bone structure and contouring technique.
To determine your face shape, consider the following factors:
-
Measure your face length: Measure the distance from the top of your forehead to the bottom of your chin.
-
Determine your facial width: Measure the width of your face from one ear to the other.
-
Identify your facial features: Note the shape of your jawline, nose, and facial bones.
- Compare your measurements: Compare your face length to width to determine your face shape, such as oval, round, square, or heart-shaped.
Accentuating Facial Features
By strategically applying contouring techniques, dancers can create the illusion of defined facial features, enhanced bone structure, and a more dramatic overall appearance. Contouring is an essential skill for dancers, as it helps to accentuate facial features, creating a more polished and refined look in photos.
To achieve facial symmetry, identify the areas of your face that you want to define, such as the cheekbones, nose, or jawline. Use a contour product that's one to two shades deeper than your natural skin tone to create the illusion of depth.
Feature framing is another key technique to master. This involves applying a lighter shade of foundation or highlighter to the high points of your face, such as the tops of your cheekbones, nose, and cupid's bow. This creates a subtle contrast that enhances your natural features.
When contouring, remember to blend, blend, blend! Harsh lines and uneven transformations can detract from your overall look. Practice makes perfect, so experiment with different techniques and products to find what works best for you. With practice, you'll be able to create a flawless, camera-ready look that showcases your best features.
Highlighting for Radiant Complexion
To achieve a radiant complexion, carefully select a highlighter that's one to two shades lighter than your foundation to create a subtle, natural-looking glow. This will give you a healthy, lit-from-within appearance that's perfect for capturing stunning dance photos.
When it comes to applying highlighter, remember:
-
Target high points: Apply highlighter to the tops of your cheekbones, nose, and cupid's bow to create a natural-looking glow.
-
Blend, blend, blend: Make sure to blend the highlighter well, especially around the edges, to prevent harsh lines.
-
Less is more: Start with a light hand and build up your highlighter gradually – it's easier to add more than it's to eliminate excess product.
- Set with powder: Set your highlighter with a light dusting of translucent powder to secure its longevity throughout your dance routine.
Eye Makeup for Dramatic Effect
Dramatic eye makeup can elevate your overall dance look, transforming you into a mesmerizing performer who commands attention on stage.
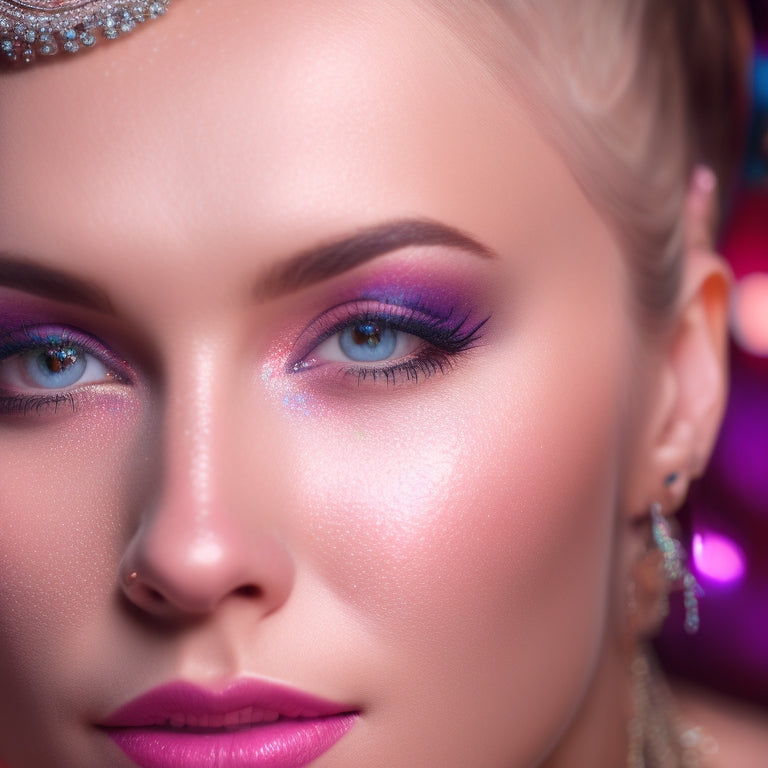
When it comes to creating a dramatic eye look, it's all about building depth and dimension. Start by applying a light, shimmery eyeshadow all over your lid to act as a base.
Next, use a medium-toned eyeshadow to create Smoky Nuances in the crease, blending well to avoid harsh lines. This will add depth and dimension to your eyes.
To take your look to the next level, apply a Dramatic Liner to your upper lash line, making sure to wing it slightly at the outer corner to create a cat-eye effect. This will elongate your eyes and add drama to your overall look.
Remember to line your lower lash line with a pencil or a kohl liner to add more depth.
Long-Lasting Lip Color Techniques
You can achieve a long-lasting lip color that complements your dance makeup look by applying a lip liner to define your lip shape, then filling it in with a matching lipstick or gloss. This technique guarantees a precise, bold lip color that won't feather or fade during your performance.
To take your lip color to the next level, try these expert tips:
-
Prime your lips: Apply a lip primer to create a smooth, even surface for your lip color to adhere to.
-
Layer your color: Use color layering to build up your lip color gradually, starting with a light layer of lip liner, followed by a matching lipstick or gloss.
-
Set with powder: Dust a light layer of translucent powder over your lip color to set it in place and prevent feathering.
- Finish with a gloss: Apply a clear or tinted gloss over your lip color to add shine and dimension.
Finishing Touches for Flawless Photos
Your camera-ready complexion is just a few finishing touches away, as strategically placed highlights and subtle definition can elevate your overall aesthetic and create a flawless, photo-perfect finish. To achieve this, focus on setting priorities: emphasize the high points of your face, such as the tops of your cheekbones, nose, and cupid's bow.
Apply a subtle highlighter or illuminator to these areas to create a natural-looking glow. Next, define your features with a light hand, using a soft contour or bronzer to add depth and dimension. Blend, blend, blend – seamless changes are key to a flawless finish.
Finally, don't forget about photo editing. Even with impeccable makeup skills, a little post-production tweaking can make all the difference. Adjust the brightness, contrast, and saturation to enhance your features and create a truly stunning image.
Frequently Asked Questions
Can I Use My Everyday Makeup for Dance Photoshoots?
You can't rely solely on your everyday makeup for a dance photoshoot; it's a special occasion that requires more emphasis on natural enhancement, so consider upgrading your look with bolder, camera-friendly products for stunning results.
How Do I Prevent My Makeup From Getting Oily on Stage?
As you step into the spotlight, imagine your makeup staying flawless. To prevent oiliness on stage, you'll want to moisturize beforehand, then apply a silicone-based primer to create a barrier, ensuring your makeup stays in place and shine-free.
Do I Need to Set My Makeup With Powder or Spray?
'When you're getting ready for a performance, you'll want to set your makeup with a powder or spray to guarantee a long-lasting finish. In your morning routine, apply a light dusting of translucent powder or a few spritzes of setting spray to keep your look fresh.'
Can I Use Shimmer Products for a More Dramatic Look?
When going for a dramatic look, you can strategically use shimmer products, placing them on high points like cheekbones, cupid's bow, and brow bone for a radiant glow, or add a glitter accent to specific areas for extra drama.
Will Individual Lashes or Strip Lashes Look Better in Photos?
When deciding between individual lashes and strip lashes for photos, you'll want to take into account lash application and durability. Individual lashes provide a natural look, but may not withstand heavy dance movements, whereas strip lashes offer a dramatic look with better lash durability.
Related Posts
-

Elevate Your Dance Choreography With Top Video Editing Tools
You're just a few clicks away from maximizing your dance choreography potential! With top video editing tools like Ad...
-

Dance Wear Must-Haves for Elevated Performance
To raise your dance performance, prioritize wear that offers superior breathability and comfort. Look for moisture-wi...
-

Elder Hall Hosts Bird Dance Extravaganza
On March 1, 2024, Elder Hall will come alive with the 'Dancing with the Birds' event, a mesmerizing fusion of music, ...


