10 Essential Costume Construction Tips for Performers
Share
You're about to bring your stage presence to life with a costume that's both functional and dazzling, and it all starts with a solid construction plan. Choose fabrics that drape and flow with your movements, like chiffon or silk, and opt for stretchy fabrics for comfort. Take precise measurements for a tailored fit and utilize pattern drafting techniques. Invest in essential tools like a sewing machine and hot glue gun, and don't forget to work efficiently to avoid fatigue. With these foundational tips, you'll be well on your way to creating a show-stopping costume - and there's more to explore to take your creation to the next level.
Key Takeaways
• Choose lightweight fabrics with drape and flow, and consider fabrics with stretch for comfort and ease of movement.
• Take accurate measurements and create personalized patterns for a tailored fit that flatters the performer's body type.
• Organize fabric efficiently, use precise cutting tools, and take breaks to avoid fatigue and discomfort during construction.
• Reinforce seams and stress points with durable fastenings and supportive materials to ensure the costume can withstand performance demands.
• Address construction issues immediately, and use high-quality materials to prevent problems and ensure a professional finish.
Choosing Fabric for Belly Dance Costumes
When selecting fabric for your belly dance costume, consider the drape, flow, and movement of the material, as it will greatly impact how your outfit looks and feels during performance. You want a fabric that will move with you, not restrict your movements or weigh you down.
Fabric importance is key, as heavier fabrics can be overwhelming and hot under stage lights. Opt for lightweight fabrics like chiffon, georgette, or silk that will flow beautifully and keep you cool.
Another essential factor is fabric stretch. You'll want a fabric that stretches with you, allowing for a full range of motion. Look for fabrics with a bit of give, like spandex or lycra. These will provide comfort and flexibility during your performance.
Avoid stiff or rigid fabrics that can restrict your movements and cause discomfort. By choosing the right fabric, you'll feel confident and comfortable on stage, allowing you to focus on your dance and entertain your audience.
Pattern Making for Curvy Bodies
When creating a costume that flatters your curves, you'll want to start by taking precise measurements to guarantee a comfortable, tailored fit.
It's crucial to understand your body type - are you an hourglass, pear-shaped, or apple-shaped? By considering these factors, you'll be able to draft an accurate pattern that celebrates your unique silhouette.
Measuring for Fit
To guarantee a flawless fit, you'll need to take precise measurements, especially if you have a curvy body, as traditional pattern-making techniques often fall short in accommodating unique shapes and sizes. Body scanning technology can be a game-changer, providing accurate measurements and eliminating human error. However, if you don't have access to a body scanner, don't worry! You can still achieve a perfect fit with good old-fashioned measuring tape.
Here's a quick guide to get you started:
| Measurement | Description |
|---|---|
| Bust | Measure around the fullest part of your bust, keeping the tape level and parallel to the floor. |
| Waist | Measure around the narrowest part of your natural waistline, keeping the tape level and parallel to the floor. |
| Hips | Measure around the fullest part of your hips, usually about 7-9 inches (18-23 cm) below your waistline. |
| Inseam | Measure the length of your inseam by placing the tape along the inside of your leg, from the top of the thigh to the ankle. |
Body Type Variations
Now that you've got your measurements in hand, it's time to contemplate how your body type will impact your costume's fit, particularly if you have a curvy figure that doesn't conform to traditional pattern-making standards.
As a performer, you know that a well-fitting costume is essential for comfort, confidence, and safety on stage. When it comes to curvy bodies, pattern making requires some special considerations. Here are a few key adjustments to keep in mind:
-
Petite adjustments: If you're petite, you may need to shorten patterns to avoid overwhelming your frame. Look for petite-specific patterns or adjust the length of your patterns to flatter your proportions.
-
Plus size considerations: If you're plus-sized, you may need to add more room in the bust, waist, or hips. Consider adding extra width to your patterns or using plus-size specific patterns.
-
Bust adjustments: If you have a larger bust, you may need to add more room in the front of your patterns. Consider adding a bust adjustment to your patterns or using a pattern specifically designed for larger busts.
- Hip and thigh adjustments: If you have curvy hips and thighs, you may need to add more room in the seat and thighs of your patterns. Consider adding extra width to these areas or using a pattern specifically designed for curvy figures.
Accurate Pattern Drafting
Create a personalized pattern by drafting a custom-fit blueprint that caters to your unique curvy silhouette, guaranteeing a flawless fusion of comfort and style on stage. This is especially important for performers with curvy bodies, as generic patterns often don't accommodate their shape. By creating a tailored pattern, you'll guarantee a comfortable and secure fit, allowing you to focus on your performance without wardrobe malfunctions.
Take inspiration from historical inspirations, such as Victorian-era corsets or 1920s flapper dresses, which often featured intricate patterns and curves. These designs can serve as a starting point for your own custom pattern.
Additionally, utilize digital aids like pattern-making software or online tutorials to streamline the process. These tools can help you create a precise, tailored fit, reducing the risk of errors and ensuring a professional finish.
Essential Tools for Costume Construction
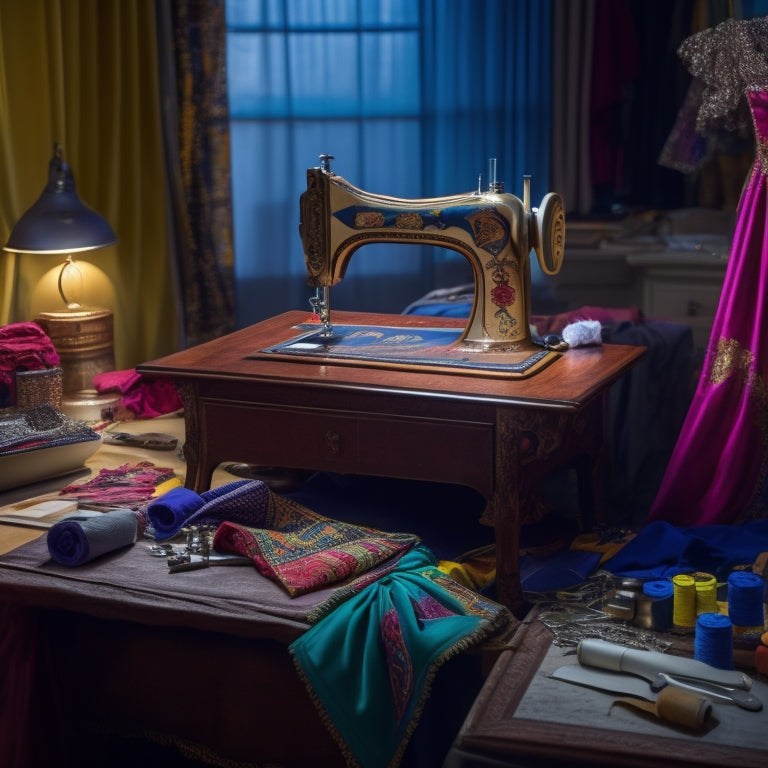
You'll frequently find yourself exploring the world of costume construction with a trusty sewing machine, a sturdy pair of scissors, and a reliable hot glue gun. These essential tools will become your go-to companions as you bring your costume designs to life.
To guarantee a safe and efficient work environment, it's vital to stock your costume toolbox with the following must-haves:
-
Sewing Machine: A reliable sewing machine is the backbone of your costume construction process. Invest in a machine that can handle various fabrics and stitches.
-
Hot Glue Gun: A hot glue gun is perfect for attaching embellishments, sequins, or other decorations to your costume.
-
Scissors: Invest in a pair of sharp, dedicated scissors for cutting fabric, and another for cutting other materials like cardboard or foam.
- Measuring Tape: A flexible measuring tape is essential for taking accurate body measurements and ensuring a perfect fit.
Cutting and Preparing Fabric Efficiently
As you begin cutting and preparing fabric for your costume, you'll want to start by selecting the right fabric for the job - and that means considering factors like durability, stretch, and texture.
Next, you'll need to master efficient cutting techniques that minimize waste and guarantee accurate cuts.
Fabric Selection Tips
When selecting fabric for your costume, consider the performance demands and choose materials that can withstand the rigors of repeated wear and tear, intense lighting, and dramatic movements. You want fabrics that are durable, comfortable, and suitable for the performance environment.
To guarantee you make the right choice, consider the following factors:
-
Fabric weight: Choose fabrics with a weight that suits the costume's design and the performer's comfort. Lighter fabrics are suitable for flowing costumes, while heavier fabrics are better for structured pieces.
-
Fabric grading: Select fabrics with a grading that suits the performance's level of activity. For high-energy performances, choose fabrics with a higher grading for added durability.
-
Breathability: Opt for fabrics that allow for airflow to keep performers cool and comfortable during intense performances.
- Flammability: Assure the fabric meets the required flammability standards for your performance venue and regulations.
Efficient Cutting Techniques
With your fabric selected, it's time to cut and prepare it efficiently, ensuring you make the most of your material and minimize waste. To achieve fabric economy, start by organizing your fabric on a large, flat surface, smoothing out wrinkles and creases. Use a rotary cutter and mat or sharp scissors to cut your fabric, following the grain line to prevent distortion. Consider using a cutting grid or ruler to guarantee accurate measurements.
Cutting ergonomics are vital, so make sure to take regular breaks to stretch your hands, wrists, and back to avoid fatigue and discomfort. Always cut away from your body, and use a self-healing mat or other protective surface to prevent damage and injury. When cutting multiple layers, use a walking foot or even feed foot on your sewing machine to help guide the fabric smoothly and prevent bunching.
Working With Sequins and Beads Safely
Handling sequins and beads demands meticulous attention to detail to avoid damage to your costume, workspace, and even yourself. When working with these delicate embellishments, prioritizing Sequin Safety and proper Bead Handling is crucial to guarantee a successful and safe costume construction experience.
Here are some crucial tips to keep in mind:
-
Use a lint-free cloth or paper to contain stray sequins and beads, preventing them from getting lost or scattered around your workspace.
-
Work over a surface that can be easily cleaned, such as a tablecloth or a dedicated beading mat, to minimize the risk of damage or loss.
-
Use a pair of tweezers to handle individual beads or sequins, allowing for precise placement and minimizing the risk of accidents.
- Keep a small vacuum cleaner or a sticky roller nearby to quickly clean up any spills or messes, ensuring a safe and organized workspace.
Building Structured Costumes With Boning
When building structured costumes with boning, you'll need to select the right materials to support your design.
You'll want to choose boning materials that provide the necessary stability and flexibility for your performer's movements.
Choosing Boning Materials
You'll want to select boning materials that provide the right balance of flexibility, rigidity, and durability for your structured costume, considering factors like the performer's movement, fabric choice, and desired silhouette. This balance is important to make sure the costume is both comfortable and supportive.
When exploring boning options, consider the following materials:
-
Steel boning: Offers excellent durability and rigidity, making it ideal for structured garments that require heavy support.
-
Plastic boning: A popular choice for its flexibility and lightweight properties, suitable for costumes that require more flexibility.
-
Nylon boning: Provides a balance between flexibility and rigidity, making it suitable for costumes that require a mix of both.
- Rigidity-enhanced boning: A hybrid option that combines the benefits of steel and plastic boning, offering enhanced durability and flexibility.
When choosing a boning material, prioritize material durability to make sure the costume remains safe and functional throughout the performance. By selecting the right boning material, you'll create a structured costume that not only looks stunning but also prioritizes the performer's comfort and safety.
Creating Structured Silhouettes
Now that you've selected the ideal boning material, it's time to bring your structured costume to life by strategically placing and shaping the boning to create a stunning, three-dimensional silhouette that accentuates the performer's movements.
As you begin, remember the corsetry basics: boning should be placed to support the body, not constrict it. When shaping the boning, consider the silhouette evolution you want to achieve. Will it be a dramatic, hourglass figure or a sleek, modern silhouette?
To create a structured silhouette, start by identifying the key areas of the body that require support. Typically, these include the bust, waist, and hips. Use your boning material to create a framework that provides gentle, even pressure. Avoid applying too much pressure, which can be uncomfortable and even dangerous.
Instead, focus on creating a smooth, fluid shape that complements the performer's movements. As you work, keep in mind the performer's comfort and safety above all else. With patience and attention to detail, you'll be able to craft a stunning, structured costume that showcases the performer's skills while ensuring their safety and well-being.
Creating Durable and Secure Fastenings
How do you guarantee that your costume stays securely in place during a high-energy performance, without worrying about embarrassing malfunctions? One of the most critical aspects of costume construction is creating durable and secure fastenings. A well-designed fastening system can make all the difference between a confident performance and a wardrobe disaster.
Here are some essential tips to make sure your costume stays put:
-
Choose the right snap fasteners: Select snap fasteners that are suitable for the type of fabric and weight of your costume. Ensure they're securely attached to withstand the rigors of performance.
-
Opt for hook systems: Hook systems are a great alternative to zippers and can provide added security. Use high-quality hooks that can support the weight of your costume.
-
Reinforce seams and stress points: Reinforce seams and stress points with additional fabric or stabilizing materials to prevent tears and damage.
- Test and adjust: Always test your costume's fastenings before a performance and make adjustments as needed to guarantee a secure and confident performance.
Adding Embellishments and Decorations
Adding embellishments and decorations can elevate your costume from ordinary to extraordinary, and with a few key techniques, you can create a visually stunning piece that commands attention on stage.
To get started, consider adding flower accents to your costume. These delicate details can add a touch of elegance and sophistication to your overall design. You can use fabric paint, appliques, or even hand-bead individual flowers to create a truly unique look.
Another way to add visual interest to your costume is with beaded fringe. This eye-catching element can add movement and texture to your design, making it perfect for dynamic performances. When working with beaded fringe, make sure to firmly attach it to your costume to prevent it from coming loose during the show. You can use a strong adhesive, like hot glue or epoxy, to guarantee that your embellishments stay in place.
Remember to always prioritize safety when adding embellishments and decorations to your costume. Avoid using materials that may be a tripping hazard or obstruct your vision.
With a little creativity and attention to detail, you can create a show-stopping costume that's both beautiful and safe.
Finishing Techniques for a Professional Look
With your embellishments and decorations securely in place, it's time to focus on the finishing techniques that will give your costume a polished, professional look. These final touches can make all the difference in creating a cohesive and impressive costume.
Here are some essential finishing techniques to master:
-
Edge stitching: Use a contrasting thread color to create a decorative edge along seams, adding a professional touch to your costume.
-
Hemming techniques: Learn various hemming methods, such as invisible hems or bound hems, to create a clean, finished look.
-
Seam finishing: Use techniques like serging or binding to prevent fraying and give your seams a professional finish.
- Topstitching: Add a decorative topstitch to emphasize design elements, create visual interest, and reinforce seams.
Troubleshooting Common Construction Errors
As you work on your costume, you'll inevitably encounter mistakes that can make or break the overall look, and recognizing these common construction errors is essential to saving your costume from disaster.
Error analysis is vital in identifying and correcting mistakes before they escalate into major problems. One common error is incorrect pattern scaling, which can result in a poorly fitted costume. To prevent this, double-check your measurements and make sure your pattern is correctly scaled.
Another common mistake is inadequate reinforcement, which can lead to costume pieces coming apart during performance. To prevent this, use strong threads, reinforce seams with interfacing or stabilizer, and add additional support to high-stress areas.
Problem prevention is key in costume construction. Take your time, and don't rush through the construction process. If you notice a mistake, stop and correct it immediately. Don't assume it's a minor issue that can be fixed later.
Frequently Asked Questions
How Do I Handle Costume Malfunctions During a Performance?
"When disaster strikes on stage, stay calm and think fast! Reach for your trusty Emergency Kit, stocked with Quick Fixes like safety pins, needle and thread, and fabric tape to salvage your costume and save the show!"
Can I Alter a Costume to Fit a Different Body Type?
If you need to alter a costume to fit a different body type, start by doing a body scan to identify key measurements, then make pattern adjustments to guarantee a comfortable, safe, and secure fit.
What's the Best Way to Store Costumes When Not in Use?
When the curtain falls, you carefully cradle your costumes in a climate-controlled sanctuary, shielding them from moisture and pests, and store them in breathable, acid-free containers to preserve their beauty and extend their lifespan.
How Do I Clean Delicate or Beaded Costume Pieces?
When cleaning delicate or beaded costume pieces, you'll want to perform fabric testing first to make sure you're using the right gentle cleaning method, avoiding harsh chemicals and abrasive materials that could damage the fabric or dislodge beads.
Can I Use Hot Glue to Attach Sequins and Beads?
Imagine yourself sparkling under the stage lights, but not because of a hot glue mishap! When attaching sequins and beads, opt for a specialized bead adhesive instead of hot glue, ensuring a secure, long-lasting hold without damaging your delicate pieces.
Related Posts
-

Dancewear Bags to Keep You Organized and Stylish
When it comes to dancewear bags, you want something that's both functional and stylish. Look for durable materials li...
-

Dance Practice Wear Picks for Maximum Comfort and Performance
When choosing dance practice wear, you want gear that optimizes comfort and performance. Opt for moisture-wicking fab...
-

Festive Reindeer Cross Stitch Pattern Delights Crafters
This festive reindeer cross stitch pattern, featuring Dancer, one of Santa's beloved reindeer, is a delightful treat ...


