Capturing Movement: 10 Essential Photography Tips
Share
When you press the shutter, you're not just capturing a moment - you're revealing the essence of movement in time. To do it justice, you need to master your camera settings, anticipating the perfect pose, lighting, and composition. Experiment with shutter speed, aperture, and ISO to convey dynamism and energy. Don't forget to focus on the subtleties - the way fingers dance, hands gesture, and facial expressions convey emotion. As you click, you're telling a story of movement and emotion. Continue capturing the kinetic energy, and you'll discover the secrets to breathtaking, mesmerizing photos that leap off the page.
Key Takeaways
• Adjust camera settings to freeze movement, using fast shutter speeds and wide apertures to capture dynamism and energy.
• Experiment with low-angle and high-angle shots to add variety to your movement captures.
• Use wide-angle and telephoto lenses to capture different perspectives and emphasize movement.
• Anticipate and freeze intricate poses, focusing on posture, arm placement, and hand movements to convey emotional intensity.
• Control creative blur with shutter speed to create mesmerizing motion trails and capture speed effects with artistic blur.
Mastering Camera Settings for Movement
As you track a sprinter bursting out of the blocks or a bird taking flight, mastering camera settings for movement becomes vital to capture the dynamism and energy of the scene.
To freeze the action, you'll need to adjust your shutter speed, aperture, and ISO. A fast shutter speed (at least 1/1000th of a second) will help you capture sharp images, while a wide aperture (around f/2.8) will separate your subject from the background. Don't forget to adjust your ISO accordingly to avoid noise.
When it comes to camera angles, experiment with low-angle shots to add drama and emphasize the movement. A low-angle shot looking up at your subject will create a sense of power and dynamism. Alternatively, a high-angle shot looking down will convey a sense of speed and urgency.
Focal lengths also play an important role in capturing movement. A wide-angle lens (around 10-22mm) will provide a sense of expansiveness, while a telephoto lens (around 70-200mm) will compress the scene and emphasize the movement.
Understanding Belly Dance Poses
Capturing the mesmerizing undulations of a belly dancer requires you to anticipate and freeze the intricate poses that convey the essence of this ancient art form. As you focus on the dancer's movements, remember that belly dance is an art form rich in cultural significance and historical roots. Understanding the nuances of each pose is essential to capturing the dancer's intended expression.
Pay attention to the dancer's posture, arm placement, and hand movements. Notice how the hips, torso, and arms work together to create fluid, sinuous lines. Look for opportunities to capture the dancer's dynamic gestures, such as the subtle tossing of the head or the dramatic sweep of the arm. Consider the emotional intensity of each pose, and aim to convey that intensity through your photography.
As you work with the dancer, be mindful of the cultural context and historical roots of belly dance. This awareness will help you approach the shoot with sensitivity and respect, resulting in photographs that not only showcase the dancer's technical skill but also honor the art form's rich heritage.
Capturing Dynamic Body Isolation
As you focus your lens on the dancer's body, you'll want to isolate specific parts to highlight their fluid movements. By doing so, you'll create visually striking images that accentuate the beauty of body isolation.
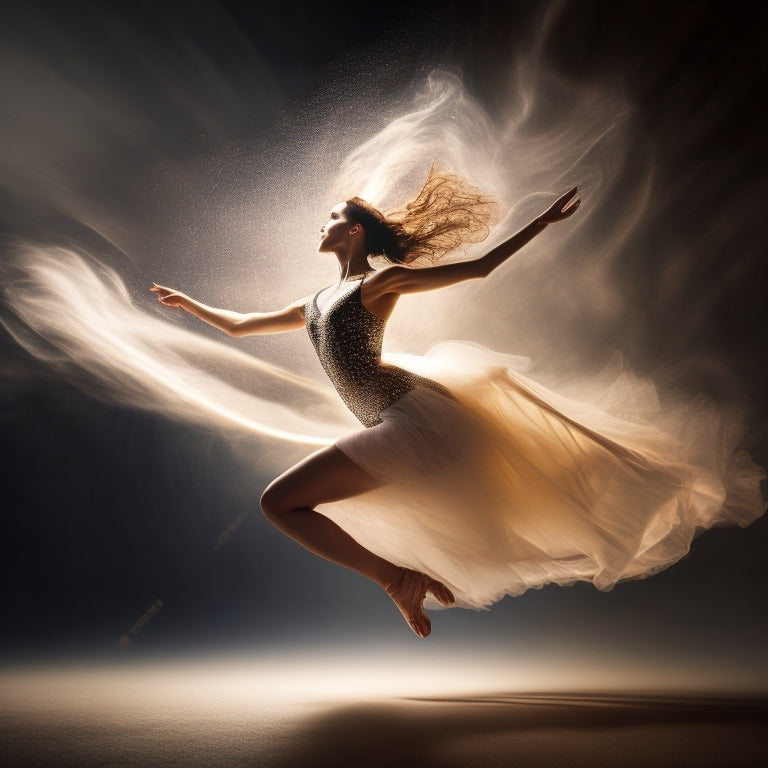
Freeze dynamic moments, like the flick of a wrist or the extension of an arm, to capture the essence of the dance.
Isolate Body Parts
Zooming in on a subject's hands or feet can inject a fresh dose of dynamism into your portraits, as if the viewer is experiencing the scene firsthand. By isolating body parts, you're able to capture the subtleties of body language, conveying emotions and telling a story without showing the entire subject. Focus on the anatomical details that reveal character, like the defined muscles in a dancer's legs or the worn fingers of a seasoned musician.
When you zero in on these areas, you're not just capturing a physical attribute, but a window into the subject's personality. The tension in a fist, the relaxation of a shoulder, or the gentle touch of a hand – each element speaks to the subject's emotional state. By honing in on these details, you're able to convey a more nuanced narrative, one that's rich in emotional depth.
This anatomical focus allows you to strip away distractions, revealing the essence of your subject's being.
Freeze Dynamic Moments
By freezing dynamic moments, you're able to suspend the kinetic energy of a subject's movements, isolating a fleeting gesture that conveys the essence of their personality.
To capture these dynamic poses, you'll need a fast shutter speed to stop motion and freeze the action. Aim for a minimum of 1/1000th of a second to guarantee sharp images. With quick clicks and instant capture, you'll be able to preserve the intensity of the moment.
To add visual interest, experiment with motion blur and speed lines. These creative techniques will convey a sense of energy and dynamism, drawing the viewer's eye to the subject.
By using a fast shutter, you'll be able to freeze the action, creating a sense of stopped motion. This will allow you to isolate specific moments, revealing the subtleties of your subject's movements.
With practice, you'll be able to capture frozen instants that reveal the essence of your subject's personality, conveying power and emotion in a single frame.
Working With Natural Light Sources
When stepping out of the studio, you'll often find that Mother Nature provides the most flattering, softbox-like light - especially during the golden hours of dawn and dusk. These periods offer a warm, ethereal glow that wraps your subject in soft shadows, adding depth and dimension to your captures.
The Golden Hour, in particular, is a photographer's dream, with its warm, honey-toned light that casts long, gentle shadows across your subject's face and body. To maximize this effect, position your subject near a reflective surface, like a wall or a lake, to bounce the soft light and create an even more flattering illumination.
As you work with natural light, remember to adjust your camera settings accordingly, taking into account the changing intensity and color temperature of the light. By doing so, you'll be able to harness the full potential of Mother Nature's softbox, capturing movement and life with stunning results.
Using Shutter Speed for Blur
As you press the shutter release, the world around your subject begins to blur, like a watercolor painting in motion, and it's your shutter speed that's the masterful brushstroke controlling the amount of creative blur in your frame.
With a slower shutter speed, you can create mesmerizing motion trails that convey the energy and dynamism of your subject's movement. This technique is especially effective for capturing speed effects, such as the blur of a cyclist's wheels or the streak of a runner's legs.
To achieve this effect, try setting your shutter speed to around 1/30th of a second or slower. This will give you a beautiful, artistic blur that adds depth and emotion to your image. As you experiment with slower shutter speeds, remember to compensate with a wider aperture or lower ISO to avoid overexposure.
With practice, you'll master the art of using shutter speed to create stunning motion trails that tell a story of movement and energy.
Focusing on Expressive Hand Movements
When you're behind the lens, you're not just capturing faces - you're revealing a story through the subtle yet powerful language of hand movements.
As you focus on your subject's hands, remember that every placement, gesture, and finger position conveys emotion and intent.
Hand Placement Matters
Your camera captures the subtleties of your subject's hand placement, so make sure those hands are conveying the emotions and story you intend to tell. A slight adjustment in finger tension or hand angle can completely shift the mood of the image.
Here are some tips to keep in mind:
-
Pay attention to finger tension: Relaxed fingers can convey a sense of calm, while tense fingers can suggest anxiety or frustration.
-
Experiment with hand angles: A slight tilt of the wrist can add a touch of elegance or sophistication to the image.
-
Use hands to frame the face: Placing hands near the face can create a sense of intimacy and vulnerability.
-
Capture hands in motion: Freezing hands in motion can add a sense of energy and dynamism to the image.
-
Don't forget about the negative space: Leaving some space around the hands can create a sense of simplicity and minimalism.
Fingers Tell a Story
Focusing on expressive hand movements, you can capture fingers that dance, gesture, or caress, revealing the subtleties of human emotion and adding depth to your narrative. The intricate finger anatomy, with its delicate joints and expressive tips, is a photographer's dream.
A curled finger can convey vulnerability, while a splayed hand can signify confidence. Understanding hand symbolism is key to capturing the nuances of human emotion.
Notice how the subject's fingers interact with their environment. Do they gently cradle an object or grasp it firmly? These subtle differences speak volumes about their character.
Pay attention to the way light dances across the contours of their fingers, accentuating the ridges and valleys. By emphasizing the expressive qualities of the hands, you can create a visual language that transcends words.
Gestures Speak Volumes
As you explore the intricate dance of fingers, you'll find that gestures speak volumes about your subject's thoughts, emotions, and intentions, making expressive hand movements a powerful storytelling tool in your photographic narrative.
Capturing authentic gestures can reveal cultural nuances and emotional authenticity, adding depth to your story. Here are some tips to help you master the art of capturing expressive hand movements:
-
Pay attention to context: Consider the setting, occasion, and cultural background to accurately interpret your subject's gestures.
-
Anticipate and react: Be prepared to capture fleeting moments of emotional expression, like a nervous fidget or a joyful clap.
-
Experiment with angles: Shoot from unusual perspectives to add drama and emphasize the gesture's significance.
-
Focus on hands in motion: Freeze the action to convey energy and dynamism, or use a slower shutter speed to create a sense of blur and flow.
-
Look for subtlety: Don't just focus on grand gestures – subtle movements like a gentle touch or a hesitant reach can speak volumes about your subject's emotions.
Creating Movement With Panning Shots
Panning shots are a great way to add dynamic movement to your videos. To achieve a panning shot, you need to move your camera horizontally from one side to another while keeping your subject in focus. This technique can create a sense of motion and lead the viewer's eye across the frame.
Tips for Successful Panning Shots
-
Use a Tripod: A tripod can help you achieve a smooth and steady panning motion. Make sure your tripod is stable and can support the weight of your camera.
-
Adjust Your Shutter Speed: To capture motion blur and convey a sense of speed, use a slower shutter speed. Experiment with different settings to achieve the desired effect.
-
Practice Makes Perfect: Panning shots require practice to master. Start by practicing with slow-moving subjects before moving on to faster subjects like cars or athletes.
-
Focus on Your Subject: Keep your subject in focus throughout the panning motion. You can use manual focus or continuous autofocus to ensure sharp images.
-
Plan Your Shot: Think about the direction of movement and composition before starting your panning shot. Visualize the final result and adjust your framing accordingly.
Panning shots can add visual interest and cinematic quality to your videos. With practice and the right techniques, you can create impressive panning shots that enhance your storytelling.
Showcasing Costume Details and Textures
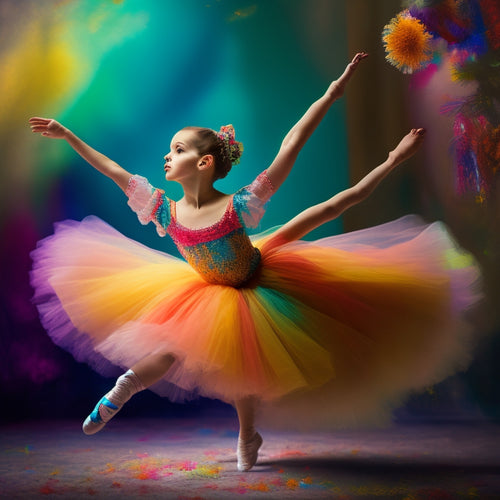
As you focus your lens on the intricate details of a costume, you'll want to highlight the way fabric folds and ruffles catch the light, the sparkle of embellishments and accessories, and the mesmerizing patterns created by beading and sequins.
By doing so, you'll create visually stunning images that transport viewers into the world of the costume's creator.
Fabric Folding and Ruffles
When capturing the intricate folds and ruffles of your costume, experiment with angles and lighting to accentuate the texture and dimensionality of the fabric, drawing the viewer's eye to the intricate details that make the garment come alive. You want to showcase the draped elegance and ruffled drama of the fabric, creating a sense of movement and flow.
To achieve this, try the following techniques:
-
Shoot from a low angle to emphasize the folds and ruffles, creating a sense of grandeur and opulence.
-
Use sidelighting to highlight the texture of the fabric, adding depth and dimension to the image.
-
Experiment with backlighting to create a sense of luminosity and ethereal quality.
-
Pay attention to the way the fabric drapes and folds, using the natural curves and lines to create a sense of movement and flow.
-
Don't be afraid to get up close and personal, capturing the intricate details and textures of the fabric to create a sense of intimacy and connection.
Embellishments and Accessories
With every bead, sequin, and stitch, your costume's embellishments and accessories tell a story of craftsmanship and imagination. It's up to you to capture them in a way that makes the viewer feel like they can reach out and touch them.
As you frame your shot, consider the prop styling - will you incorporate props that complement the costume's details or keep the focus solely on the garment? Pay attention to jewelry details, zooming in on intricate patterns or sparkling gemstones. A headpiece focus can add drama, while a veil movement shot can create an ethereal quality. Don't forget to accentuate armlets, highlighting the way they catch the light.
When composing your shot, think about the textures and colors you want to emphasize. Use natural light to bring out the subtleties of the fabric, or experiment with artificial light to create moody, high-contrast images.
Beading and Sequins
Explore the intricate world of beading and sequins, where every stitch and sparkle tells a story, and your camera becomes the masterful storyteller.
As you investigate this world, you'll uncover the rich history of sequins, dating back to ancient civilizations, and the intricate beadwork techniques that have been passed down through generations.
To capture the essence of beading and sequins, follow these tips:
-
Play with light: Use soft, diffused light to bring out the sparkle in sequins, or experiment with dramatic lighting to create shadows that highlight the texture of beads.
-
Get up close and personal: Macro shots can reveal the intricate details of beadwork, making each stitch and sequin a work of art.
-
Experiment with angles: Shoot from unusual angles to add dynamism to your images and emphasize the texture and dimension of beading and sequins.
-
Showcase the process: Document the creative process of beading and sequin application to tell a story of craftsmanship and dedication.
-
Highlight the details: Focus on specific elements, like the way light catches a sequin or the intricate pattern of beadwork, to create visually striking images.
Capturing Emotion and Expression
As you raise your camera, focus on the fleeting moments that reveal the essence of your subject's personality, because it's in the subtle quirks and gestures that true emotion and expression come alive. Capturing emotion and expression is about more than just snapping a photo – it's about telling a story, conveying a mood, and evoking a response.
Look for Facial Tension – the slight furrowing of the brow, the pursing of the lips, or the softening of the jawline – as these subtle cues can speak volumes about your subject's emotional state. Eye Contact is also essential, as it can convey confidence, vulnerability, or intensity. Don't be afraid to experiment with angles and lighting to accentuate these details, and remember to shoot in RAW to capture the full range of tonal values.
As you click the shutter, remember that the goal is to distill the essence of your subject's emotional landscape into a single frame. By honing in on the subtleties of facial expression and body language, you'll be able to capture the raw emotion and intensity that will leave your audience mesmerized.
Editing for Dramatic Effect
When you sit down to edit, you're not just tweaking sliders, you're crafting a narrative that draws the viewer in and refuses to let go. Your goal is to enhance the mood and create storytelling accents that transport the viewer into the world you've captured.
Here are some essential editing tips to help you achieve dramatic effect:
-
Mood enhancement: Adjust the color palette to evoke emotions. Cool tones can convey a sense of calm, while warm tones can create a sense of energy.
-
Contrast and exposure: Balance contrast to create depth and dimension. Adjust exposure to reveal details in the shadows or highlights.
-
Noise and grain: Add subtle noise or grain to create a sense of texture and authenticity.
-
Selective color grading: Isolate specific colors to draw attention to your subject or create a sense of harmony.
-
Local adjustments: Make targeted adjustments to specific areas of the image to guide the viewer's eye and create visual interest.
Frequently Asked Questions
How Do I Handle Shy or Self-Conscious Dance Subjects?
When working with shy or self-conscious dance subjects, you build trust by establishing comfort, creating a relaxed atmosphere, and being approachable, which helps them let their guard down and reveal their true selves in front of your lens.
What Are the Best Camera Lenses for Capturing Movement?
"Don't think you need the priciest lens to capture movement - you're wrong! You'll want a lens with a focal length between 70-200mm, like a Canon EF 70-200mm f/2.8L, to freeze dynamic dance moves with precision and clarity."
Can I Use a Smartphone to Capture High-Quality Dance Photos?
You can master Smartphone Tricks and achieve Mobile Mastery, capturing stunning dance photos with your phone; experiment with burst mode, slow shutter speeds, and clever composition to freeze or blur motion with artistic flair.
How Do I Get Permission to Photograph a Live Dance Performance?
'You're about to open the door to a hidden treasure trove of dance photography opportunities. Before you snap a single frame, do your due diligence: scout the venue, respect performance etiquette, and secure permission to capture the magic.'
What Is the Ideal Camera Angle for Capturing Dynamic Movement?
When capturing dynamic movement, you'll want to experiment with low angles, getting down low to emphasize the subject's power, or try a bird's eye view to showcase their fluidity, creating a sense of freedom and energy in your frame.
Related Posts
-

Elevate Your Style With These 3 Feminine Casual Wear Must-Haves
You're just a few stylish tweaks away from elevating your feminine casual wear from basic to breathtaking! Start by e...
-

Get the Dance Floor Popping: Wedding Flip Flops Sign
Create a memorable and entertaining wedding reception with a 'Get the Dance Floor Popping' flip flops sign that combi...
-

Artistic Fusion: Lerma's Little Dancer Triumphs
As I reflect on my artistic journey, I'm struck by the profound evolution that has occurred, marked by the triumphant...


