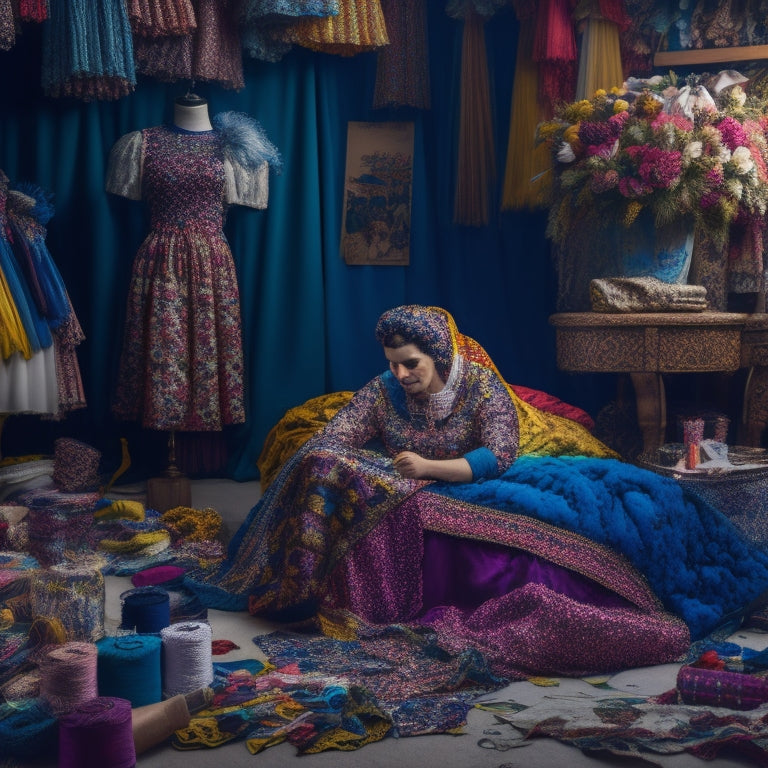
Why Embellish Your Costume With These Pro Tips
When you embellish your costume, you're not just adding decorations - you're crafting a story. You're transporting yourself and others into a world of imagination and wonder. To get started, collect essential supplies like scissors and hot glue guns, and organize them for easy access. Choose fabrics that evoke emotions and select colors that set the mood of your costume. Then, strategically place embellishments, balance beads and sequins, and master the art of appliqué. As you dive deeper into the world of costume embellishment, you'll uncover the secrets to creating a truly unforgettable character.
Key Takeaways
• Embellish your costume to create visual hierarchy and draw attention to key elements that define the character's identity and story.
• Strategically place beads, sequins, and appliqué to create focal points and add depth to your design.
• Balance bold embellishments with neutral colors and textures to avoid overwhelming the senses and create a cohesive look.
• Select thread colors deliberately to craft a narrative and create visual interest, and incorporate various textures for added depth.
• Prioritize tasks and set dedicated time blocks for embellishing to ensure efficient time management and avoid common mistakes like over-accessorizing.
Essential Supplies for Embellishment
As you immerse yourself in the world of embellishment, gather these must-have supplies to transform your costume from ordinary to extraordinary. A well-stocked embellishment toolbox is essential for creating a show-stopping costume.
Start by collecting basic supplies like scissors, hot glue guns, and needle and thread. Don't forget about specialty items like rhinestones, sequins, and fabric paint.
Organize your supplies using a storage bin or case to keep everything within reach. A designated workspace with good lighting and a comfortable seating area will also help you stay focused and inspired.
Proper supply organization is key to a successful embellishment experience. Invest in a portable storage container or a multi-tiered craft cart to keep your supplies tidy and accessible. Label each compartment to make sure you can quickly find what you need.
With your embellishment toolbox stocked and organized, you'll be prepared to ignite your creativity and bring your costume vision to life. Remember to always follow safety guidelines when working with hot tools and materials to guarantee a fun and accident-free embellishment experience.
Choosing the Right Fabric
As you begin picking fabrics for your costume, keep in mind that the right choice can make or break the overall look.
You'll want to take into account the weight of the fabric, as a flowing gown requires a lighter material than a structured corset.
Fabric Weight Matters
When crafting your costume, the weight of your fabric is essential, since it directly impacts the overall drape, movement, and authenticity of your final piece. You'll want to choose a fabric that not only looks great but also feels comfortable to wear.
Lighter fabrics like silk are perfect for creating flowing, elegant pieces with beautiful draping. Silk's lightweight nature allows for a natural flow that's perfect for capturing the essence of historical or fantasy costumes.
On the other hand, heavier fabrics like cotton provide durability and structure, making them ideal for costumes that require more shape and form. Cotton's sturdiness also makes it a great choice for costumes that need to withstand repeated wear and tear.
Fabric Texture Options
With a vast array of textures available, you'll want to carefully ponder the tactile experience you want to create for your costume, as the right fabric texture can transport you to a different era or fantasy domain.
Velvet, for instance, offers nuances that can evoke luxury and sophistication. Look for crushed velvet for a subtle sheen or panne velvet for a more dramatic effect.
If you're aiming for a more ethereal quality, silk varieties like charmeuse or habotai can add a touch of elegance. Dupioni silk, with its subtle sheen and textured weave, can create a sense of ancient mysticism.
When selecting your fabric, remember to contemplate the drape, flexibility, and durability you need for your costume. Will it be worn for an extended period or subjected to intense physical activity?
Fabric Color Selection
You've carefully considered the tactile experience of your costume, now it's time to bring it to life with a palette that pops - the right fabric color can make or break the overall aesthetic, so choose wisely!
When selecting fabrics, don't just follow your personal preferences; consider the emotional impact of colors on your audience. Color psychology plays a significant role in evoking emotions, so think about the mood you want to evoke. For instance, cool tones like blues and greens can convey calmness, while warm tones like oranges and yellows can energize.
Stay ahead of the game by incorporating trend forecasting into your design process. Research current color trends and forecasted palettes to guarantee your costume remains modern and fresh.
Remember, your fabric choice can make or break the overall cohesiveness of your design. By balancing personal taste with psychological and trend-driven considerations, you'll create a visually stunning costume that resonates with your audience.
Design Principles for Visual Impact
As you begin to design your costume, you'll want to master the art of visual impact by balancing the visual elements, harmonizing the colors you've chosen, and focusing on key elements that make your costume truly stand out.
By doing so, you'll create a cohesive look that's both aesthetically pleasing and attention-grabbing.
Balance of Visual Elements
When crafting a show-stopping costume, you're balancing a delicate dance of visual elements, where harmony and contrast converge to create an unforgettable visual impact. To achieve this, you need to strike a balance between different visual elements. This is where the principles of design come in.
| Visual Element | Description |
|---|---|
| Size | Use varying sizes to create visual hierarchy, drawing attention to focal points |
| Shape | Combine geometric and organic shapes to add contrast and interest |
| Texture | Mix smooth and rough textures to create tactile experiences |
Harmony of Colors Used
By thoughtfully selecting a palette of colors that harmonize, you'll create a visually stunning costume that commands attention and makes a lasting impression. Your color choices can evoke emotions, convey a message, and even establish a brand identity. Understanding color psychology is essential in making informed decisions about your costume's color scheme.
Here are some tips to achieve harmony in your color selection:
-
Monochromatic: Use different shades of a single color to create a cohesive look.
-
Complementary: Pair colors that are opposite each other on the color wheel to create a striking contrast.
-
Analogous: Choose colors that are next to each other on the color wheel for a smooth progression.
- Neutral Accent: Balance bold colors with neutral shades to avoid overwhelming the senses.
Focus on Key Elements
To maximize visual impact, focus on key elements that draw the eye and create a clear visual hierarchy in your costume design. You want your audience to instantly grasp the essence of your character, so prioritize the most important features.
Identify the Costume Essentials that define your character's personality, era, or profession. Are you a regal queen or a swashbuckling pirate? Make sure the key elements that convey this identity stand out.
When setting Design Priorities, bear in mind that less is often more. Avoid clutter and make certain each element serves a purpose. Balance bold statements with negative space to create visual harmony.
Direct the viewer's attention to the most critical features by using size, color, and placement strategically. By focusing on key elements, you'll create a clear visual language that communicates your character's story, making your costume a true showstopper.
Balancing Beads and Sequins
As you sprinkle beads and sequins onto your costume, remember that striking a balance between these embellishments is important to avoid overwhelming the overall design. You want to create a visually appealing look that draws attention to your costume, not one that's too flashy or distracting.
To achieve this balance, follow these tips:
-
Bead placement: Strategically place beads to create visual interest, focusing on areas like the bodice, sleeves, or hem.
-
Sequin clustering: Group sequins together to create a sense of movement or texture, rather than scattering them randomly.
-
Balance scale: Make sure that the size and number of beads and sequins are proportional to the costume's overall design.
- Visual harmony: Create a sense of harmony by balancing bold embellishments with simpler areas of the costume.
Mastering the Art of Appliqué
As you start mastering the art of appliqué, you'll need to carefully select fabrics that complement your costume's theme and color palette.
Next, you'll want to stabilize your design to guarantee a smooth, even application.
Fabric Selection Secrets
With a vast array of fabrics at your fingertips, you're positioned to discover the secret to appliqué mastery: selecting the perfect fabrics that will make your costume's embellishments pop with dimension and personality.
Fabric history and cultural significance play an important role in choosing the ideal fabric for your appliqué. For instance, did you know that silk was once a symbol of wealth and power in ancient China? Understanding the origins and cultural connotations of different fabrics can elevate your costume's narrative and authenticity.
Here are some essential tips to keep in mind when selecting fabrics for appliqué:
-
Contrast: Choose fabrics with contrasting colors and textures to create visual interest.
-
Durability: Opt for fabrics that can withstand the wear and tear of repeated use.
-
Flexibility: Select fabrics that can be easily molded and shaped to fit your design.
- Breathability: Consider fabrics that allow for airflow to prevent discomfort and sweat buildup.
Stabilizing Your Design
You've curated the perfect fabrics, now it's time to bring your design to life by stabilizing your appliqué with a solid foundation that will make your artistry shine. This vital step guarantees your design's structural integrity, preventing it from sagging or distorting over time.
Think of it as building a strong design foundation, where every element works together in harmony.
To achieve this, you'll need a stabilizing material, such as interfacing or fusible web, which provides a secure base for your appliqué pieces. This material helps maintain the shape and structure of your design, even when handling or storing your costume.
When choosing a stabilizer, consider the weight and type of fabric you're using, as well as the level of stability required for your design.
Thread Color Harmony
Every thread color choice you make is a deliberate brushstroke on the canvas of your appliqué art, and mastering thread color harmony is the key to creating a visually stunning design that pops with personality. You're not just sewing threads together; you're crafting a visual narrative that tells a story.
To achieve harmony, follow these thread color selection tips:
-
Contrasting Hues: Pair bold, bright colors with neutral shades to create visual interest.
-
Monochromatic Schemes: Use different shades of the same color to create a cohesive look.
-
Analogous Colors: Select threads with similar hues to create a smooth, ombre-inspired effect.
- Neutral Backgrounds: Use beige, gray, or white threads as a backdrop to make your design pop.
Adding Dimension With Textures
Rummage through your fabric stash and thrift store finds to uncover a treasure trove of textures that'll add depth and visual interest to your costume.
You'll be amazed at the variety of textures you can incorporate to create a visually stunning look. Faux suede, for instance, adds a luxurious feel, while velvet ribbons introduce a touch of elegance.
Furry accents can add a whimsical touch, while ruffled lace adds a romantic flair. Experiment with bumpy fabric to create a tactile experience, or incorporate woven strips for a more subtle textured look.
Raised dots or soft pebbles can add an intriguing element to your design. The key is to balance different textures to avoid overwhelming the senses.
Creating Focal Points With Embellishments
One strategically placed embellishment can instantly draw the eye to a specific area of your costume, creating a focal point that commands attention and elevates your overall design. By incorporating focal accents, you can create visual anchors that guide the viewer's eye through your costume. This is especially effective when you want to highlight a particular feature or detail.
Here are some tips to keep in mind when creating focal points with embellishments:
-
Balance is key: Make sure that your focal point is balanced by the rest of your costume to avoid overwhelming the senses.
-
Contrast is vital: Use contrasting colors, textures, or shapes to make your focal point stand out.
-
Size matters: A larger embellishment can create a bolder focal point, while smaller ones can add subtle interest.
- Placement is everything: Strategically place your embellishment to draw the eye to a specific area, such as the chest, shoulders, or hem.
Mixing and Matching Patterns
By combining bold, contrasting patterns, you can add depth, visual interest, and a touch of whimsy to your costume, creating a look that's truly one-of-a-kind. Pattern clashing, when done correctly, can elevate your costume from basic to bold.
To master this technique, start by selecting two or three patterns that share a common color thread. This will create a visual hierarchy, drawing the eye to specific areas of your costume. Next, balance bold patterns with simpler ones to avoid overwhelming the senses. For example, pair a bold plaid with a subtle stripe or a whimsical polka dot with a solid color.
Remember, the key to successful pattern mixing is to create contrast without clashing. By striking the right balance, you'll create a visually stunning costume that's sure to turn heads.
Tips for Time-Efficient Embellishing
As you've mastered the art of mixing and matching patterns, it's time to focus on adding those intricate details that will elevate your costume from great to show-stopping, and the key to doing so efficiently lies in strategic planning and clever time-management tricks.
To maximize your embellishing time, try these scheduling hacks:
-
Schedule time blocks: Set dedicated time slots for embellishing, eliminating distractions during that time.
-
Prioritize tasks: Identify the most time-consuming embellishments and tackle them first, breaking them down into manageable chunks.
-
Use a 'stop-loss' timer: Set a timer for a specific time, say 25 minutes, and take a short break when it goes off to avoid burnout.
- Batch similar tasks: Group similar embellishing tasks together, such as sewing or beading, to optimize your workflow.
Common Mistakes to Avoid
When you're deep in the trenches of embellishing, it's easy to get caught up in the excitement of creation and accidentally sabotage your own efforts with rookie mistakes that can be costly regarding time and materials.
One common pitfall is over accessorizing - remember, less is often more. You don't want your beautiful costume to look cluttered or overwhelming. Take a step back, and edit your design to make sure each element serves a purpose.
Another mistake to avoid is making inexperience assumptions. Just because you've seen a technique online doesn't mean you're ready to tackle it. Be honest about your skill level and don't be afraid to start with simpler methods. It's better to master the basics before moving on to more complex techniques.
Additionally, don't assume you can 'wing it' without a plan. Take the time to sketch out your design, choose your materials wisely, and have a clear vision before you begin.
Frequently Asked Questions
Can I Use Embellishments on Delicate or Antique Fabrics?
When working with delicate or antique fabrics, you'll want to exercise extreme caution, considering fabric fragility and historical accuracy, to make sure your embellishments don't damage the original material.
How Do I Prevent Beads From Falling off Over Time?
Like a masterful puppeteer, you orchestrate every detail of your costume, but ensuring beads stay put is vital. Opt for a strong bead adhesive, like Gem-Tac or E6000, and choose a durable thread that can withstand the weight of your creations.
Are There Any Embellishment Techniques Suitable for Beginners?
You'll be delighted to know that, as a beginner, you can master Basic Stitches and Simple Appliques to elevate your costume! Start with running stitches, satin stitches, and French knots, then move on to attaching fabric flowers or felt shapes with ease.
Can I Use Hot Glue Guns on Sensitive or Silk Fabrics?
When working with sensitive or silk fabrics, you'll want to exercise caution with hot glue guns. Always conduct fabric testing to verify glue compatibility, and consider alternative adhesives or techniques to avoid damaging your delicate materials.
How Do I Store Embellishments to Prevent Damage or Tangling?
"When it rains, it pours," and tangled embellishments can be a real downpour! You'll want to "catch" them before they get knotted; store them in designated Embellishment Containers or clever Storage Solutions to keep them organized and damage-free.
Related Posts
-

7 Comfortable Dance Shoes to Keep You Moving
When you're searching for comfortable dance shoes, look for options that offer support, cushioning, and flexibility. ...
-

Unlock Your Creativity With Dancing Sublimation File
Dancing Sublimation File is a creative catalyst that opens up a world of vibrant design possibilities, providing high...
-

Master Pattern Dances for Social Fun
Mastering pattern dances for social fun requires a deliberate blend of technical skill, teamwork, and practice, yield...


